PART 5 – POSITION AND COLOUR ALIGN ALL REMAINING OUT OF PLACE MIDDLE-EDGE PIECES, CONTINUED FROM (PART 4)
New Orientation
Turn the whole cube so that the 2 solved sides appear on the left and right sides. See figure 24 below.
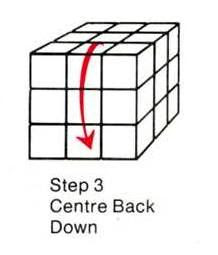
Keep this new orientation fixed, and turn just the centre up and away until all 4 remaining centre squares fall into correct colour alignment as in figure 24. Note: Blue on the left side.

At this point, you will find one of five things will happen:
Case 1 –Four middle-edge pieces out of place and not colour aligned. Use process (A) on the following page twice.
Case 2 – Three middle-edge pieces out of place and not colour aligned. Use process (A).
Case 3 – Four middle-edge pieces in position but not colour aligned. Use process (B) below twice.
Case 4 – Three middle-edge pieces out of place and one piece in position but not colour aligned. Use process (A) then process (B).
Case 5 – Two middle-edge pieces in position but not colour aligned. Use process (B).
A. Process A
The goal of Process (A) is to place all remaining unsolved middle-edge pieces into their correct positions.
The four step procedure outlined below will move three middle-edge sub-cubes, causing them to exchange their positions with each other, without disturbing other sub-cubes. Figure 25 shows the three side sub-cubes that will exchange positions. The position exchange occurs as follows: the side sub-cube marked 1 will move to the position occupied by side sub-cube marked 2; the side sub-cube marked 2 will move to the position marked 3; and the side sub-cube marked 3 will move to the position marked 1.

Now check all the remaining out of place middle-edge pieces and pick 3 that will fall into correct place if exchanged.
Remember; first find the 3 out of place middle-edge cubes that will fall into correct position if they are exchanged in the manner below:
Be careful to maintain the starting orientation when using the procedure, hold both solved outside thirds firmly in steps 1 and 3.


Repeat Process (A) steps 1-4 above until either the puzzle is solved OR you find you have left one pair of middle-edge pieces that are in position but not colour aligned. To solve this last pair go on and do process (B) steps 1-12 below.
If you find you are in Case 4, you will have 2 pairs of middle-edge pieces in position but not colour aligned as in figure 26A. Process (B) will solve them one pair at a times.


B. Process B
This 12 step process is known as Rubik’s Manoeuvre after Erno Rubik, the inventor of the cube.
Before you run Process (B), the 2 middle-edge pieces whose colours are to be flipped must be opposite each other on top of the cube as shown in figure 26A.


2 comments:
I have been trying to solve this darn little flagnog of a cube for hours on other sites. they had algorithms and I swear you needed to be a menza graduate to figure the darn thing out. I finally was able to solve it with this website! THANK YOU SO MUCH! I will probably never take the stupid thing apart again... where did I put my nail glue?
I read your site and I know that those pictures come from "Rubik's Cube - The Ideal Solution".
Post a Comment